
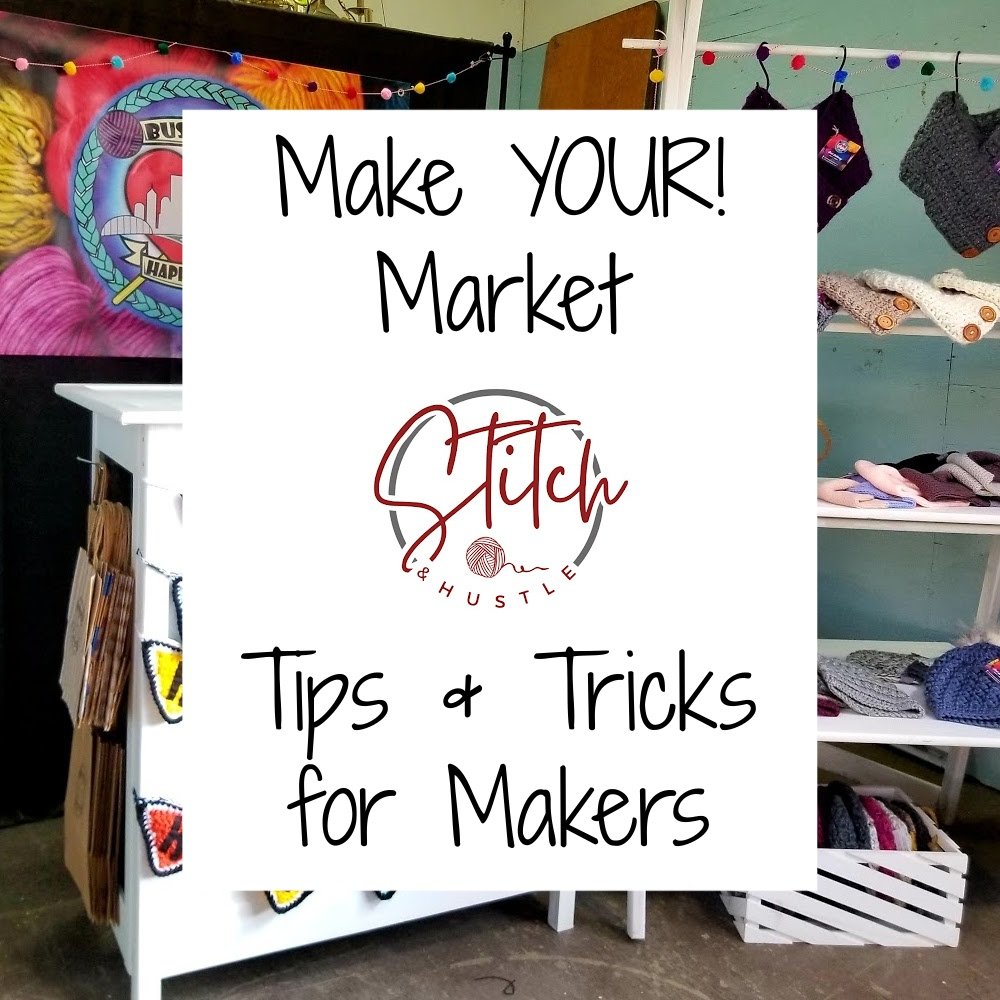
Make It YOUR! Market: Tips & Tricks for Makers at Handmade Markets
/
Tips from our friend Terry at Busy Hook Happy Heart on how to personalize and customize your market set up.
Read MoreTips from our friend Terry at Busy Hook Happy Heart on how to personalize and customize your market set up.
Read MoreOh Autumn... how I love you and wait for you all summer long but still you sneak up on me and cause a fright. Anyone else?

time for sweater weather is near
I find myself spending August clinging to summer sunny days and lightweight cottons while dreaming of sweater weather, layering up and cozy season. That duality always makes it hard to fully get into market prep and hustle mode for busy season. Then all of a sudden, as if to be a complete and utter shock, it is September and I am like... WAIT! WHAT?? HOW DID THIS HAPPEN? I must now make all the things. lol
But the truth is that there is no need for panic and stress. (Maybe just a little) :-) With some planning and organization all will be well and you too can be ready for a thriving market season.
Booth is Up at 2016 One Of A Kind Show Chicago
Part of my own "stress" is because I have made a change this year to my own show schedule. After 4 amazing years, I am sitting out the Chicago One Of A Kind Show. It was a hard decision but sometimes when those tough decisions come easy we know it is right! I am opting for a couple of much smaller area shows and events. I will miss the creative vibe and all my customers from OOAK but I felt this year it is time for something a little different.
But I still have to prep and plan and get ready for a new kind of show vibe. It is exciting. Like starting all over again. What will work and what won't? I ask this daily. Smaller spaces and new and different spaces will mean a new booth set up. Finding new ways to display my work and create an inviting "shop" is so fun. I am really excited for the challenge and creative opportunity to show my work and meet new customers. It all feels new and exciting and that is such a great feeling. I cannot wait to see what it brings.
So as you get ready for craft and market season keep in mind that it should be fun. Make lists. Have coffee and just do your best! And don't forget: visit the Stitch & Hustle Craft Fair & Market Series for all your market prep inspiration. From how to find and apply for the right markets to setting up your display for winning sales to selecting the right POS system, we've got you covered! And don't forget our handy checklist to help you Prep & Pack for Success!
Happy market season y'all!
Feel free to share your market prep tips in the comments as well.
A big shout out to every member of our awesome community who kicked butt this year during Market Season. I am so thrilled with all the feedback to our Craft Fair & Market Days Series. Whether trying to find the right event, decide your set up, select the right payment processing system for you or getting into the nitty gritty of prep, so many of you have said our posts have helped. That is why I started this blog. That is the good stuff!
Here are some highlights grabbed from Instagram from the #stitchandhustle community


Next up on the Get Your Craft Fair On Series is the perfect prep and pack. It can be overwhelming to think about all the things you don't want to forget. For me, that's a trap. Instead of focusing on what I need and planning, we find ourselves getting a bit frantic with "oh, and don't forget" items. That can lead to stress trying to remember and missing things you need. This is all easily avoidable with some solid prep and packing for your event.
For me, I break it down into four categories. This helps me go through each aspect of the event so I really don't miss a thing. I start this process as I am building the display and that way as I think of things, if they are not on the checklist already, I just jot them down. By the time for packing rolls around, I am a lean prepped machine and packing is a breeze.
Here are the categories and how I break them down followed by a sample of the checklist I use.
BOOTH: Display
Now that you have the perfect display layout for your items, make a detailed list of what you will need to get set up. By keeping the Booth Display its own category, you can focus strictly on the mechanics of setting up your display. Do you need any tools like a hammer, screw-gun, pliers, etc.? Do you need string or push pins? Will you need a step ladder or trash can? Go through each stage of your booth set up and make yourself a list of items you will need. Pack them all so that you can set up your booth exactly as you envisioned but also be prepared for what may come up!
BOOTH: Selling
What will you need to sell your products? What about payment processing; have you tested your device and updated any apps? Did you set up for Sales Tax and know the rate? Do you have business cards and a place to put them? Will you be taking custom orders? If so, how will you keep them? Do you have an order form? What about color swatches for your customers to select from? Do you need your business license on hand, is it required by the event? This is the finishing touches stuff that means so much. It is imperative to maintain brand through the whole selling experience so think of what you need to do that.
PRODUCT:
Prepping inventory can be overwhelming. That feeling of the need to make ALL THE THINGS. Take a beat. Breathe. Go through your current inventory and decide what you need to add. Make yourself a small list and production timeline to get items ready. Set mini goals such as 10 scarves week 1, 5 hats Monday, etc. Based on what you can truly achieve, don't over pressure yourself, you can create a schedule of what to make.
I also like to make a full inventory list of what I am bringing. This helps me track sales and inventory throughout the event and keep things easy. In addition to product for the event, you may want to make a list of what will be put out first so that can be packed where it is easily accessible. And, while in theory we should have all of our products prepped and ready, I always find myself with last minute To-Do's. Maybe you need to add fringe to an item. Maybe add a hem. I also like to have Work-In-Progress projects on hand to work on during slow moments in the booth. It is a great conversation starter and can help pass the time if you have down time.
HOTEL (if applicable):
For me, I like to have my tea and oatmeal. It is easy, portable and I can make sure I eat something everyday because it is easy to forget. So I have a little kit I take.
I also have my personal essentials to take to the booth each day: Travel Tea Mug, Flat Outs for my poor feet, mascara, lip gloss and face cream. If I've got these I am set for the win.
You can use this checklist that helps me or just make yourself a list of what makes you happy and get prepped to pack for success.
So you've applied for the perfect Craft Fair and got accepted. Woo Hoo! Now time to prep your display. Say What? It can be a daunting task to visualize and then realize your first craft fair set up. Have no stress. We got you!
First let's talk about your overall set up. The design and layout of your booth or display is more important than many realize. It is not as easy as popping open a few folding tables, spreading out your wares and waiting for the masses to come rolling in to buy. I have learned that the design of your display is as much a factor of a successful show and sales as the products themselves.
Before you can even think about your display, first you need to think about WHAT you will be selling. I have a variety of inventory but don’t bring all to all events. Now sure, some say “well, if you don’t bring it you can’t sell it”. But that’s not true. You can take orders, ship to customers if you don’t have something on site or any other ways to sell. You want your booth to have a cohesive look and feel. Not everything you carry will work. Think about the audience and customer base who will be attending the event and what will work.
Now that you know WHAT you are selling, it is time to focus on the display. Think inviting. Think clean. Think cozy. If you sell touchy feely products you need to make sure they are accessible. Think about how a customer will experience you, your brand and your booth. Then get to work on your display.
A word of caution before you start buying things: it may be worth it to find out if the event is supplying or renting tables to vendors. While renting may seem wasteful when you can OWN and continue to use something, you run the risk of ending up with lots of "stuff" that didn't exactly work out. You may be able to rent a table and chair from them for a small fee and use the rest of your budget on display set up. This allows you to play around until you find what works best for you. Test then buy is my motto. And before you buy, see what you have around the house that can help with your set up. Maybe you have baskets or stands. You can decorate shoe boxes. Get creative.
Build your booth in advance so you can truly see what will work. I cleared out our dining room, tape marked the floor to the exact size of my booth and did a few test runs. No matter how good things look on paper I cannot tell you how valuable this was. I was able to truly see what worked and what didn’t and it also helped things go smoothly on actual set up day.
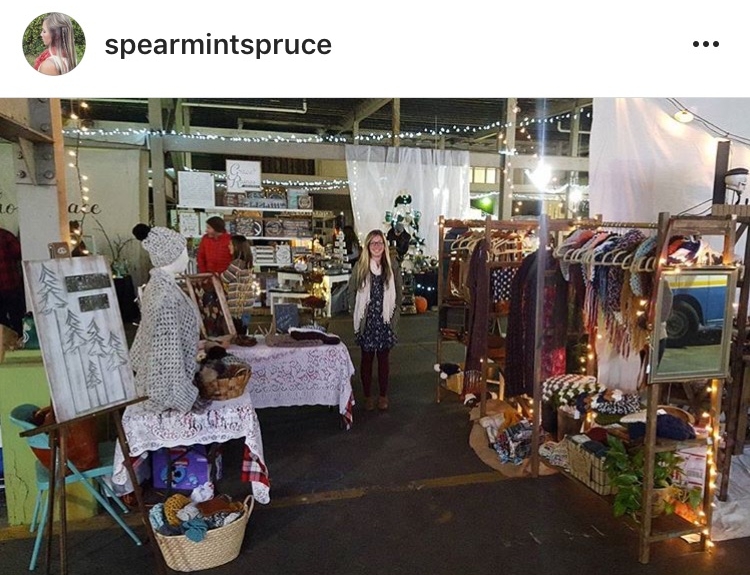
Keri from Izy & Oly did a great job of maximizing space and displaying product. Customers can get a clear view of all fabric options and the variety of products. She really maximizes space by going up and down and her use of baskets keeps things organized and clean.
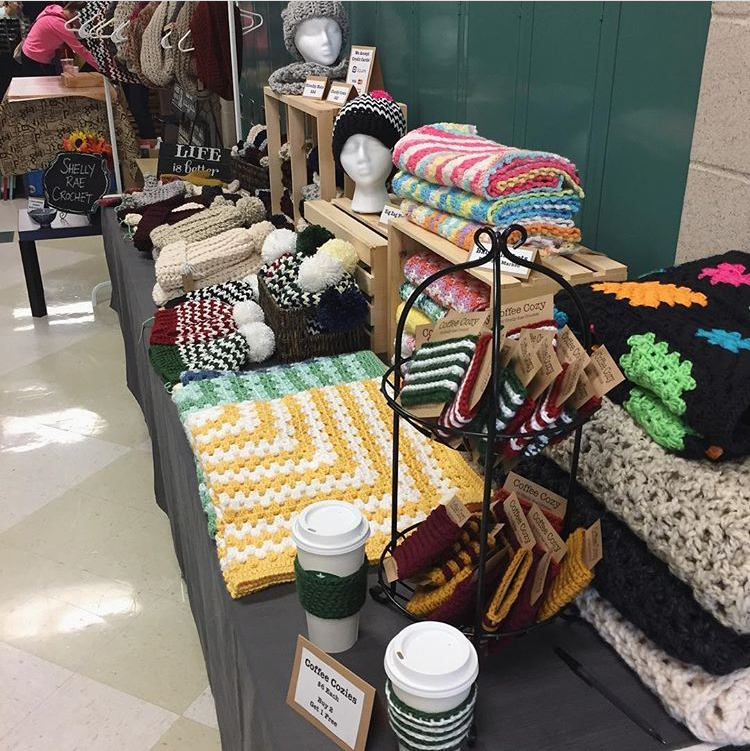
I love the look that Janet from Flowerchick Designs uses. You can clearly see her products and the variety as well as her branding. At a glance people are able to seethe colors and array of items. Her prices are clearly marked which is a big thing in display set-ups. You want to be able to answer customer questions, but also have the information available. By covering the tables with long table linens she can keep her extra inventory handy but still keep her display looking clean.
When I did my first event, I was given a 5x5 space to show my work and be ready to sell for four days in one of Chicago's biggest markets. No stress (are you kidding? I think I cried more than once). I had to maximize space but seem inviting and show my offerings. I decided to go up and down much like Keri did.
My total booth set up cost under $200 (which was $50 more than I budgeted so there's that). I used the dress forms I already had for my product photography and bought an additional set of Styrofoam heads to display multiple hat styles. I bought a variety of "Laundry" baskets at discount and filled them with lots of colorful product. This allowed me to utilize the floor space in front of my display table and also invited people to touch and feel. I actually became known as "the touchy feely booth" by the end of the event and it worked out perfectly because there was always that "crowd" vibe and fun at my booth.
Instead of "tables" I bought stackable plastic drawer totes and covered them with a solid black sheet. This allowed me to keep my inventory restock out of site to keep my both looking clean. It also allowed me to keep my restock accessible and handy as things sold.
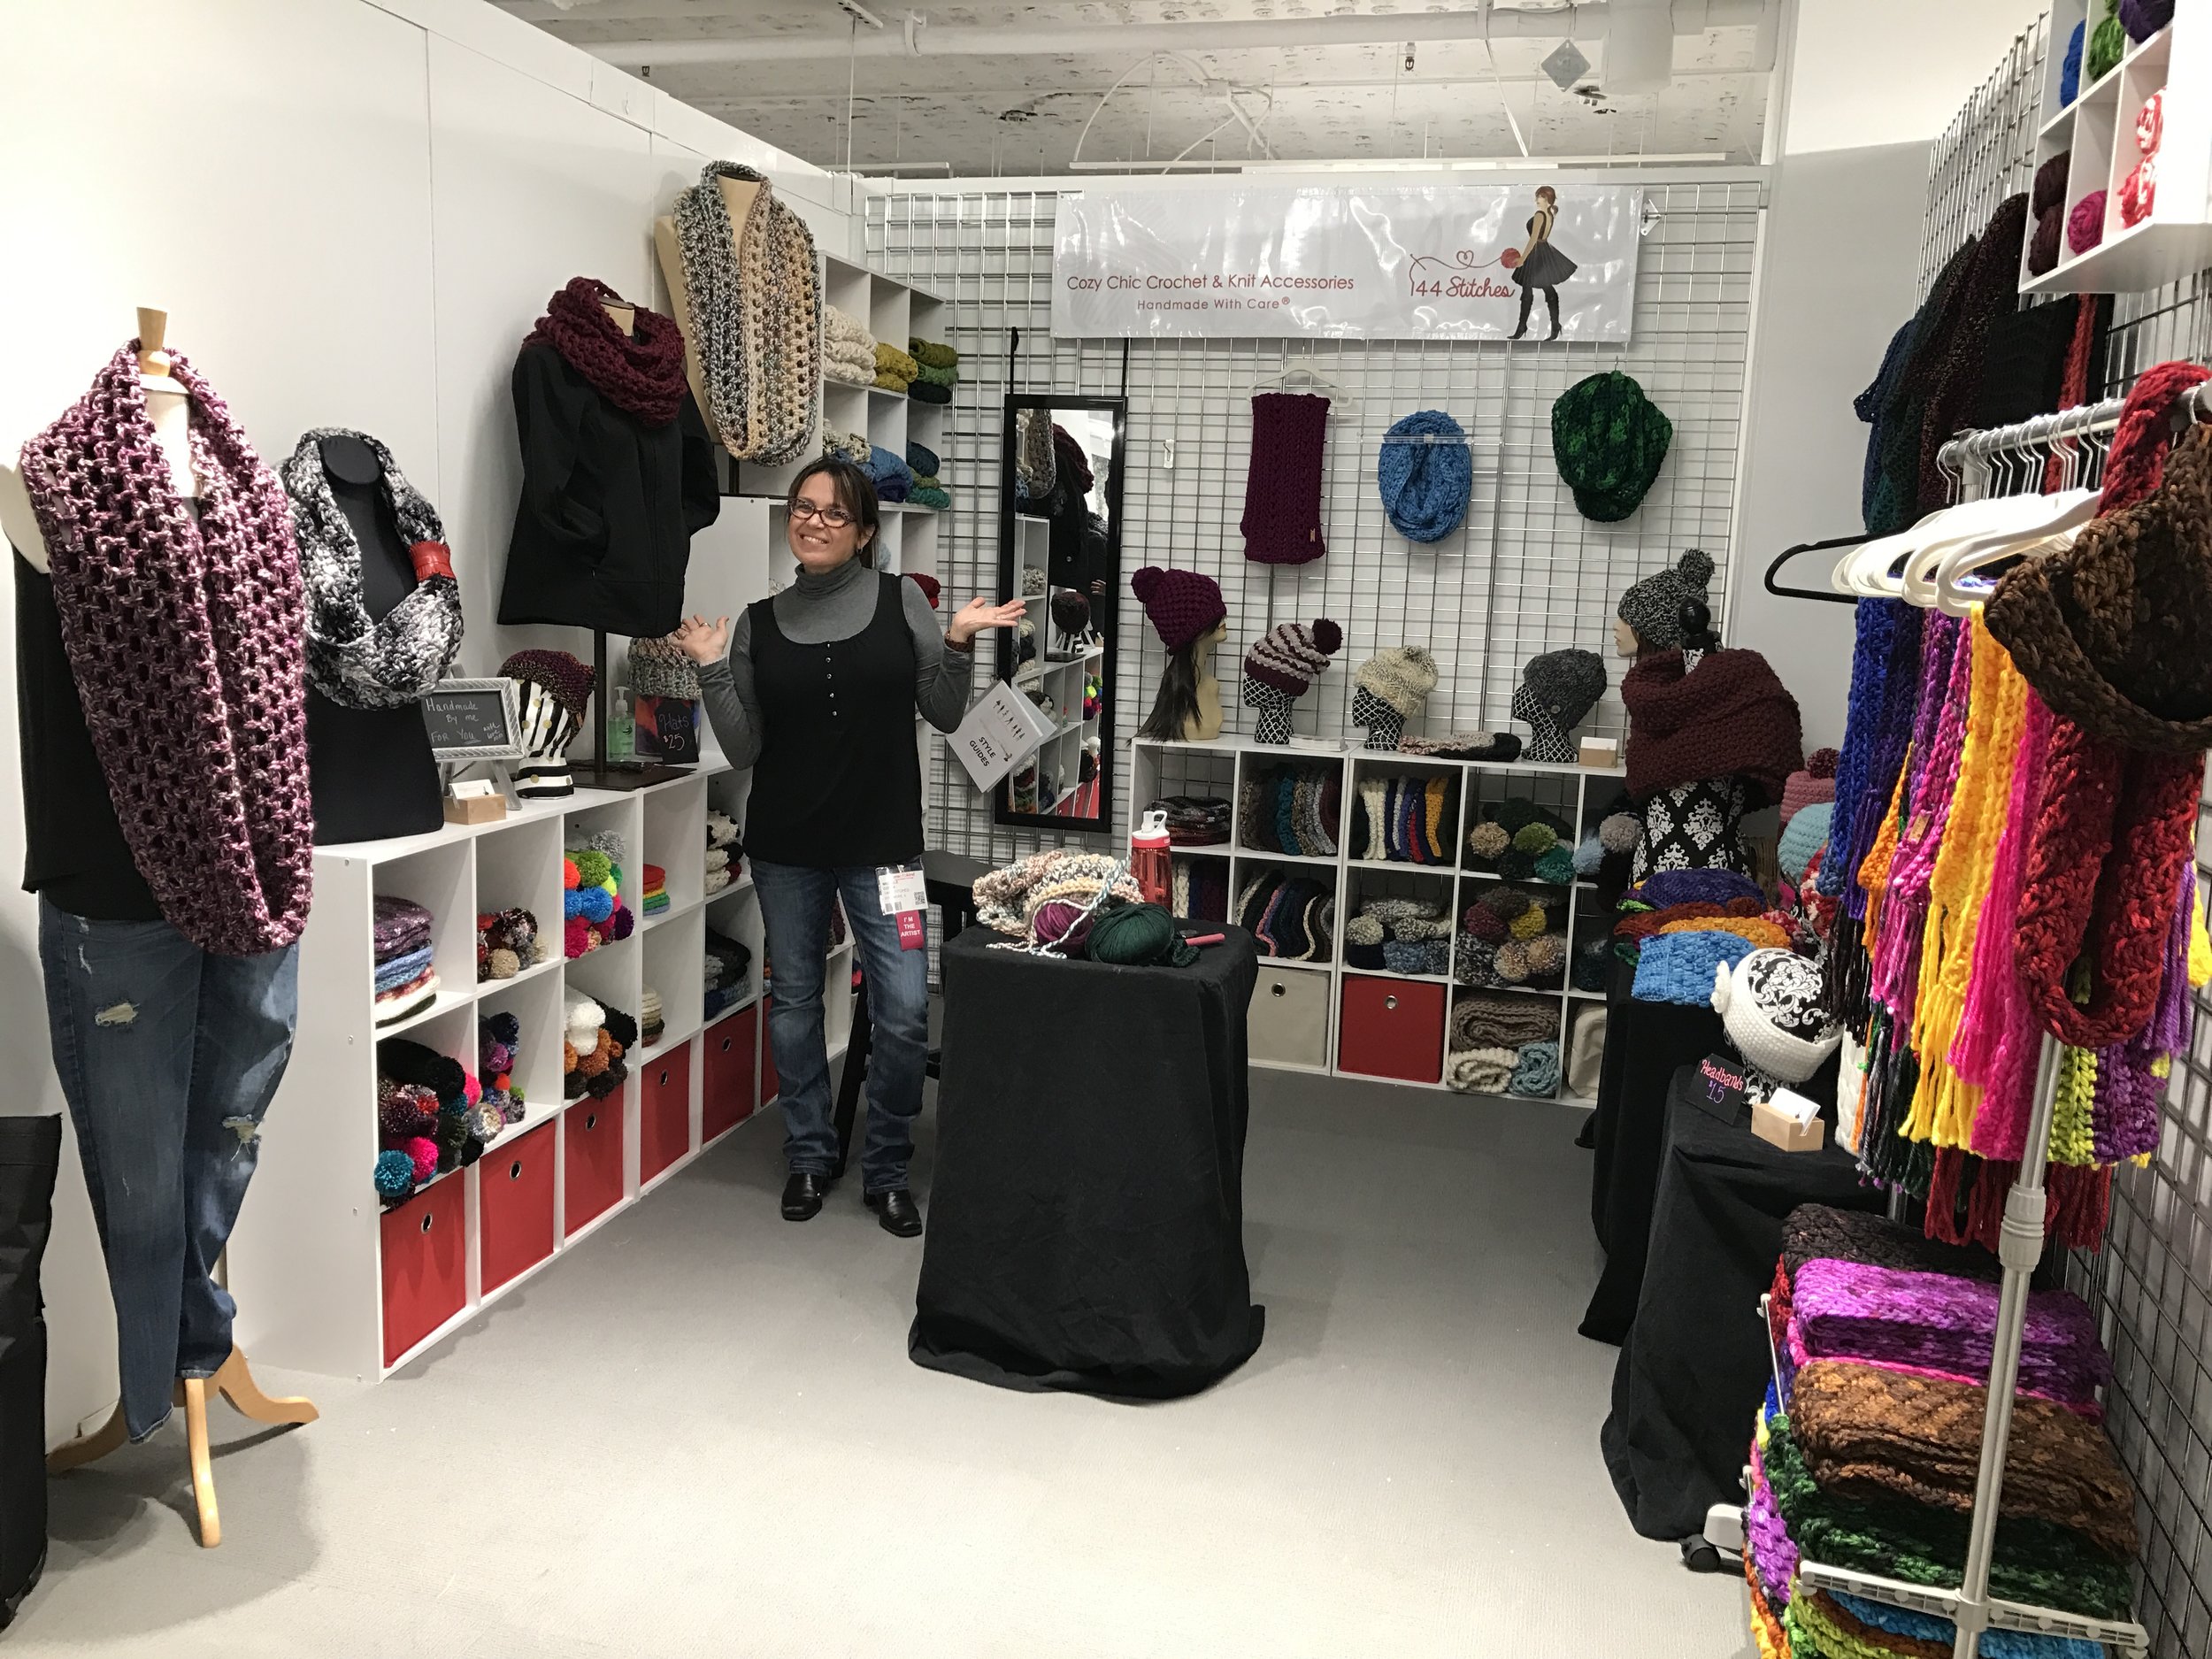
When I moved up the following year to a full 10 x 10 booth in the Fashion District of the show I had to step my game up. But I knew it would be a long term investment as well. I brought the storage units from my studio to create a Wall Of Color. I also visited stores that were going out of business to see what I could get on the cheap. I got a $1500 wall rack full unit for $125! And at a closing JC Penny I got a full set of mannequins for $50! Kinda cool.
I have since made additional changes to my set up to better invite and serve customers. I also tailor my set up to the type of event. I always start with what will I be selling and where is the event. Then make necessary tweaks to my set up as needed. But it all starts with a base set up.
Whatever your set up - it is essential to be able to keep your display well stocked. When you make sales re-stock quickly. While empty tables and shelves might be a good feeling of accomplishment, customers like to shop and browse and have choices. It is a shopping mentality. So keep your re-stock handy.
Do you sell things that need to be tried on? If yes, don't forget to have a mirror AND a place where people can see themselves in that mirror. I once saw a booth hang the mirror so far in the back corner it defeated the purpose of having one because no one could use it.
Another thing that is so important is your signage. You want to be able to have brand recognition and let customers know where they are shopping.
Last, but certainly not least, be wary of overstocking and of excess. You don't want things to seem cluttered. It is a fine balance, but an essential one. Clutter turns customers off and excess (things like extra chairs, waters, etc) make it look more like a hangout than a booth.
It is a lot but do not be overwhelmed. Take a step back and vision your booth. When thinking of your display here is a list of things to consider. Answer these questions and use this checklist to get started to building a successful display. Share your pics with the community on Instagram tagging #stitchandhustle

The year is just flying by! I cannot believe summer is almost over. So it is definitely time to kick it in high gear. It's August and you know what that means... September is just around the corner! That means cooler weather, Harvest Festivals, Cool Craft Fairs and Holiday Markets are just around the corner too. NOW is the time to prep. Actually - June is when I personally start prep but August works too :-)
Are you ready to get your Craft Fair & Festival on? Throughout August, we will have a series of posts to help you get Craft Fair Ready. I am by no means an "expert" but can share from my own experiences to help you elevate your Craft Fair game. We will feature posts on:
How To Pick The Right Craft Fair For You (this post)
Which Payment Service Is Best For You?
Setting Up Your Display For Success
Prep & Pack For A Successful Event
Check List Central Because We Love Lists!
I love attending Fairs & Festivals as much as having a booth. As an online store owner, it is a rare and special opportunity to get out and meet customers face to face. It is a chance to talk to other artists and vendors and grow in community. It is an opportunity to introduce new people to my work in a way that you can't online: by showing them the value of cozy handmade up close. But my love of all things Festivals doesn't transcend to just any festival! It is essential to be part of the right one.
So let's start at the beginning with the biggest, and seemingly most daunting, question: how to find and pick the "right" event. If you do not already have some Fairs & Festivals you know you want to apply to, here are some great links to find out about Fairs in your area:
Stitch & Hustle Market Season Tips
Research. Research. Then research some more. It can be such a sucker punch to have a "bad show" when it was all avoidable by doing just a bit of research as to what show you should apply to. Just because a Fair or Festival has tons of traffic and your target market, there are other factors to consider, such as weather and time of year. I sell cozy handmade accessories, mostly chunky heavy knitwear. So while I love a couple of local Chicago Summer Festivals, I know I have to love them as an attendee. Do people want to think about heavy knitwear in 90 degree temps outdoors? Nope.
Besides seeing if your work will be a good fit for the event, also consider is the Fair a good fit for your brand! Some things to consider and ask:
Do they only sell handmade or will you be up against a variety of small home based businesses (ie Scentsy, Chloe & Isabelle, etc.)?
It is always good to know who will also be there. You can check previous year's events and vendors to get a feel if you will be a good fit. If your work will fit in well, but also if who already is at the market attracts the same type of customer as you.
What is the typical traffic at the show? What is the last 3 year attendance?
Again -do your research. Event track records speak for themselves. While "First Annual" has lots of hype and fun, it is a much bigger risk. I like to see an event that has grown in attendance. It tells me that they keep adding value and not only do people go back but they also attract new people. Also check the vendors - do they go back? This will tell you if they found it a success or not. I mean, would you go back to a Fair you lost money at and did not sell well at?
Does the event have a strong web presence? Website? Facebook page?
This will be a huge factor when it comes to advertising. It will tell you if they do a lot of the legwork or expect the vendors to do it all. There should be a good balance, but more importantly when you drive your customers to the event site you want them to get excited to go support you there and bring friends.
Be mindful of deadlines. Be ready to get your application filled out the minute you know you want to apply. Here are a few quick tips for the application process:
1. Keep your bio short but lively. Let your personality come through but maintain professionalism. It is a tough balance so write your bio and have it saved and handy to go when you need it. Describe you, your work and what inspires you. And check your spelling! For real tho!
2. Send only high quality clean product photos. This is not your Instagram feed. You want to show your products, and especially if it is a juried show, show the quality of your work. Over stylized photos can take away from your product.
3. Read the full application directions thoroughly. Follow all of the steps, provide all of the requested materials on time, and completed.
Most shows, fairs & festivals have fees. Fees range from application fees, to booth / stand fees, to tables and chair rental fees. It is essential to look at not just the application and booth fee, but all of your related costs when deciding on a show. Here is a small checklist of things to consider about fees to get you started when considering if an event is right for you.
Factor in all of your related costs then determine what is your true break even number. Know it. Then ask yourself; Is the fee worth it? Can you make it back? Can you lose it if you don't make it back? Those are hard questions and I cannot stress enough how important they are.
Let me also take a moment to say this: No matter how much you research and prep and plan, sometimes events go wrong or people don't buy. So I suggest to have the mindset of a weekend in Vegas. Have fun. Consider the fees and costs that go into setting up to sell your wares a donation (that is what I call a Vegas gambling allowance). It is an investment into your business. While you hope to make it back, and then some, at the event, I believe the key is to not stress about it so having budgeted and the mindset that it is an investment will set you free from that stress. Because if you are not stressed, you will have fun. And if you have fun, you will likely have sales. And Sales is the ball game!
So with that I say: Happy Craft Fair season everyone.
Woo Hoo it is summer festival & craft fair season. That means we get to get outside, set up our pop-up shops & tables to show off our wares. Since I sell warm weather cozy wear, Summer festival season is something I enjoy only as a spectator and customer. But I do love the vibes.
One question many handmade artisans have is about payment processing, especially since not many people carry cash anymore. I did some research when I was starting to sell at the One Of A Kind Show in Chicago and found that I am a fan of Square. Here is a link to sign up and get a free reader and get your first $1000 free processing. (Yes I get credit for this link but no that is not a factor in my analysis)
For me, it is just easy and the fee is not too bad. I like the fact that I can get unlimited free card readers so when the booth is busy more than one of us can process sales. I like the reporting analysis because it is easy to read and lets me know what my best selling items are.
The inventory management system was a bit labor intensive to set up but they all are so this isn't a deterrent to me. I would have to set it up anywhere. It is extremely helpful to go through this step to know what really sells and what trends are happening with my products. It also gives me a good overview of traffic patterns in my booth which is extremely helpful.
I have a friend who uses the Etsy reader because it helps her presence on Etsy by increasing sales in her shop. For me, that is not a factor. Plus, I do not like the fact that it makes me subject to Etsy TOU which means I cannot directly market to those customers unless they explicitly sign up for my emails. Similar to why I don't like Pattern by Etsy, it means I am doing work for the Etsy brand instead of my own.
Whatever card reader & POS system you choose, be sure it is right for you and your needs. Below is a breakdown of the three I researched. I know that Intuit also has a card reader / POS system, but I am not familiar with it so you may want to explore that as well.
Happy Market Day season everyone

I am always looking for interesting ways to display my creations. But unless you catch a store closing sale, dress forms and mannequins are not cheap and building a display can get expensive. Fast. I also don't want the display to take away from or distract from the crochet creation I want to show off. And now that I am doing more in person appearances, such as at The One Of A Kind Show in Chicago, I also want displays that work within my booth while people have a room to walk around and shop. Meeting all the display criteria is not easy.
And, Like I said… it can get expensive fast.
So after spending a little time on Pinterest (and getting lost in the land of pretty pictures and fabulous ideas), I realized why not just build what I want? For raw materials cost of under $50 and a fun day in the garage / workshop with my fabulous husband I could get exactly what I wanted. I present to you my DIY Easter weekend in pictures and note I am EXTREMELY proud of the finished projects at the end:
We started with a scrap piece of wood from another project. We cut it to the size we wanted and then let the sanding begin.


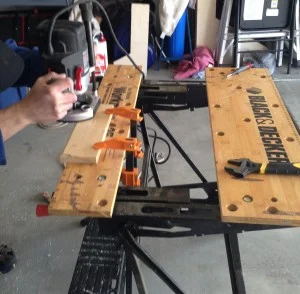
TIP: Measure the hole in the base of the Styrofoam heads to buy the right size rod. Also, buying one long rod and cutting it allows flexibility in placement or you can know the measurements you want and they will cut it in the store for you. Some places charge to cut though.
Almost done assembling the head display stand after we drilled holes for the rods.
TIP: We took a plastic hanger and traced it onto the wood for the standing frame. Use thicker wood – 1.5″ – 2″ so it will be sturdy and hold the weight of your piece. Sand the heck out of that hanger. Remember, your garments will hang here for display and you don’t want them to get snagged in the fabric. We use a tread screw at the base so that this stand can easily be taken apart for transport.
New displays are ready and one perfect Weekend with the husby in the can.
DISCLOSURES: As an Amazon Associate I earn from qualifying purchases. Posts may includes affiliate links. Read full blog disclosure here.

Hi - I’m Michele
Welcome to Stitch & Hustle. I have always loved crochet (and knit). I started this blog because I wanted to share beginner friendly entry level patterns for all levels of makers. But especially for those learning and just starting out with knitting or crochet. My patterns are super easy and a great place to practice skills with easy construction patterns - and most of the patterns are free for that very reason.
Hope you find something great to make here - and please do share your makes on social media tagging #stitchandhustle.


All photos, designs, and patterns are copyright of Stitch & Hustle unless otherwise noted. Please do not repost or claim content as your own. This site displays third party ads and contains affiliate links. Stitch & Hustle is a participant in the Amazon Services LLC Associates Program, an affiliate advertising program designed to provide a means for sites to earn advertising fees by advertising & linking to amazon.com. Read policies & disclosures here.
Thank you for visiting!
TERMS of SERVICE | PRIVACY | ACCESSIBILITY | TARGETED ADS STATEMENT | PRIVACY RIGHTS |
DO NOT SELL MY INFO | COOKIE POLICY
Stitch & Hustle © 2017 - 2025 ALL RIGHTS RESERVED.


