Crochet Pattern Writing Part 2: But Wait There's More
/I have gotten so many messages and notes since the first How To Write A Crochet Pattern post (hey - thanks for taking the time to read my blog post and write me) that it seemed fairly clear that a part deux would be in order to give you more details to have success writing your own crochet patterns.
One thing that keeps coming up is this: Did I make it seem to easy?
Sure, probably ... but that's because it really is. To me at least. And I think that's because designing is a passion for me. It is like food. The more I do then the more it nourishes and feeds me and the more I grow. As a designer there is no end to that growth, while as a human I could probably cut back on the carbs. My point is that like anything in life you love to do and want to do well, then it will take some work. But the work pays off and it feeds the cycle. It's a good thing!
I strongly suggest you read the first post here and I am going to dive into a few of the most common / frequent questions I have received as a follow up:
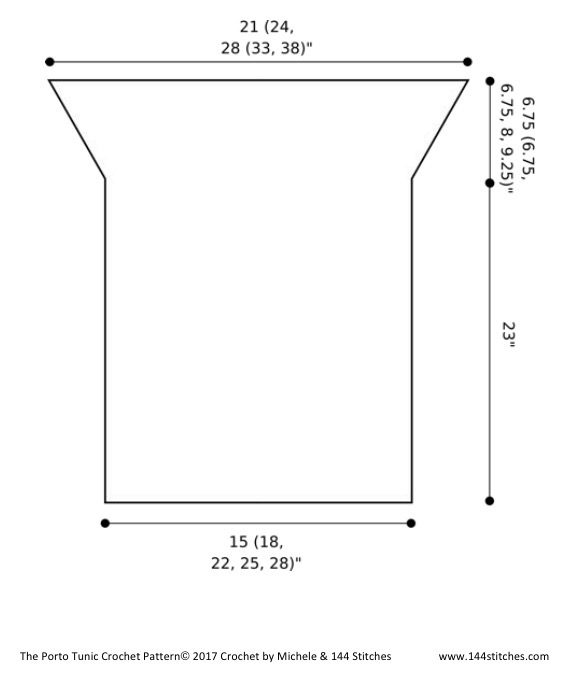
First up: Sizing

No, I do not make up my own sizing. But man that would save me so much time if I could do that lol. I follow the industry standard and in truth, most designers should be doing that so that you know your customers can rely on sizing information that is consistent. You can find the guidelines here from the Craft Yarn Council. And yet another reason to love the folks at CYC, you can print or download that information here and always have it handy!
Now, what size do you make?
Well, you can make whatever size you want. Typically I make things for myself so I design and make them for my size. But then I create the pattern for all sizes. This is where math and grading and the real not fun part of pattern writing comes in. It's math. It's work. But it is just part of the process.
Most of my garment patterns are sized for standard XS to 4x. That's because women come in all shapes and sizes and I have no idea what size my potential customer is. Someone once told me, "oh but that won't look good in your size" when I was a bigger gal. (I recently lost over 50 lbs). That made me so mad I wanted to scream. How DARE someone else decide what will or will not look good on me based on a number. With that experience in mind, and remembering I was also once a size 2 miss skinny mini me who liked a baggy look, I decided to make my patterns available in a range of sizes that are most common.
This is also why gauge and pattern notes are SO IMPORTANT! (READ THIS FOR MORE)
Let customers know if there is positive or negative ease. Let them know what size is in the "sample shown". Knitters and crocheters can tweak to their size with the right detail. So when you are writing your pattern give your customers ALL THE DETAILS they need to achieve your look and go for it - give them all the sizes. It's only a few extra minutes of math once you are in the thick of it.
Next up: Testing vs. Tech Editing
Personally - I do both. I have a tech editor and a pool of reliable testers. They do different things. My tech editor is checking my math, checking my notes and the actual pattern for best practices and that it meets industry standards. Sometimes when I am on a super tight deadline, my tech editor skips ahead and grades the sizing for me. (OK I may take advantage of this more than I like to admit but hey, I got my design mojo going).
I have to say I have grown a very reliable and amazing group of testers that I am grateful for in so many ways. OK, mushy part aside, testing is really important. Testers are actually TESTING the pattern. They will find errors (if there are any) while working up the patterns that may get missed in the mechanics of writing and grading. There may be something in the assembly that wont get caught on paper until it is worked up. testing is really not to be skipped. It is always best to have testers for each size if possible.
Next up: Copy Me Copy You Copy That.
OK that was me having a little bit of fun with wordplay. (anyone who knows I used to work in television production and knows what "copy that" means is probably giggling a little right now). Look, copying happens. I don't know why. I don't understand it. I also cannot worry about it. I was once not only copied, but the person SAID SO in her blog post. Yes, I kept a screen shot because I mean I could not believe my eyes lol. But here is the thing: if you are going to worry about copying then you are not focus on creating. I do not stress about being copied. It takes too much energy and there is nothing I can do about it. Just focus on creating and finding YOUR voice.
Designing is my passion so for me it is deep joy. Working up new stitches, new shapes, new combinations in my own point of views is not something someone else can do. So I keep focus on my designs and find it a much happier thing to focus on!
And Next Up: Policies
Policies is derived from "policing" someone told me. I am not here to police the interwebs or what other people do. Having said that, I have seen some cut-throat people do some cray cray stuff over this. Here is what I say: First of all: Ask a lawyer. No really, read this. Ask A Lawyer. (Thank you Vogue Knitting).
Personally, I have something on my patterns asserting what is my right and enforceable along with my request that they credit me for the design if someone sells something they make from it. But guys - that's all I can do: REQUEST. Keep that in mind. This falls under the "pick your battles" in life column and my energy is not best spent chasing down something I cannot enforce in a court.
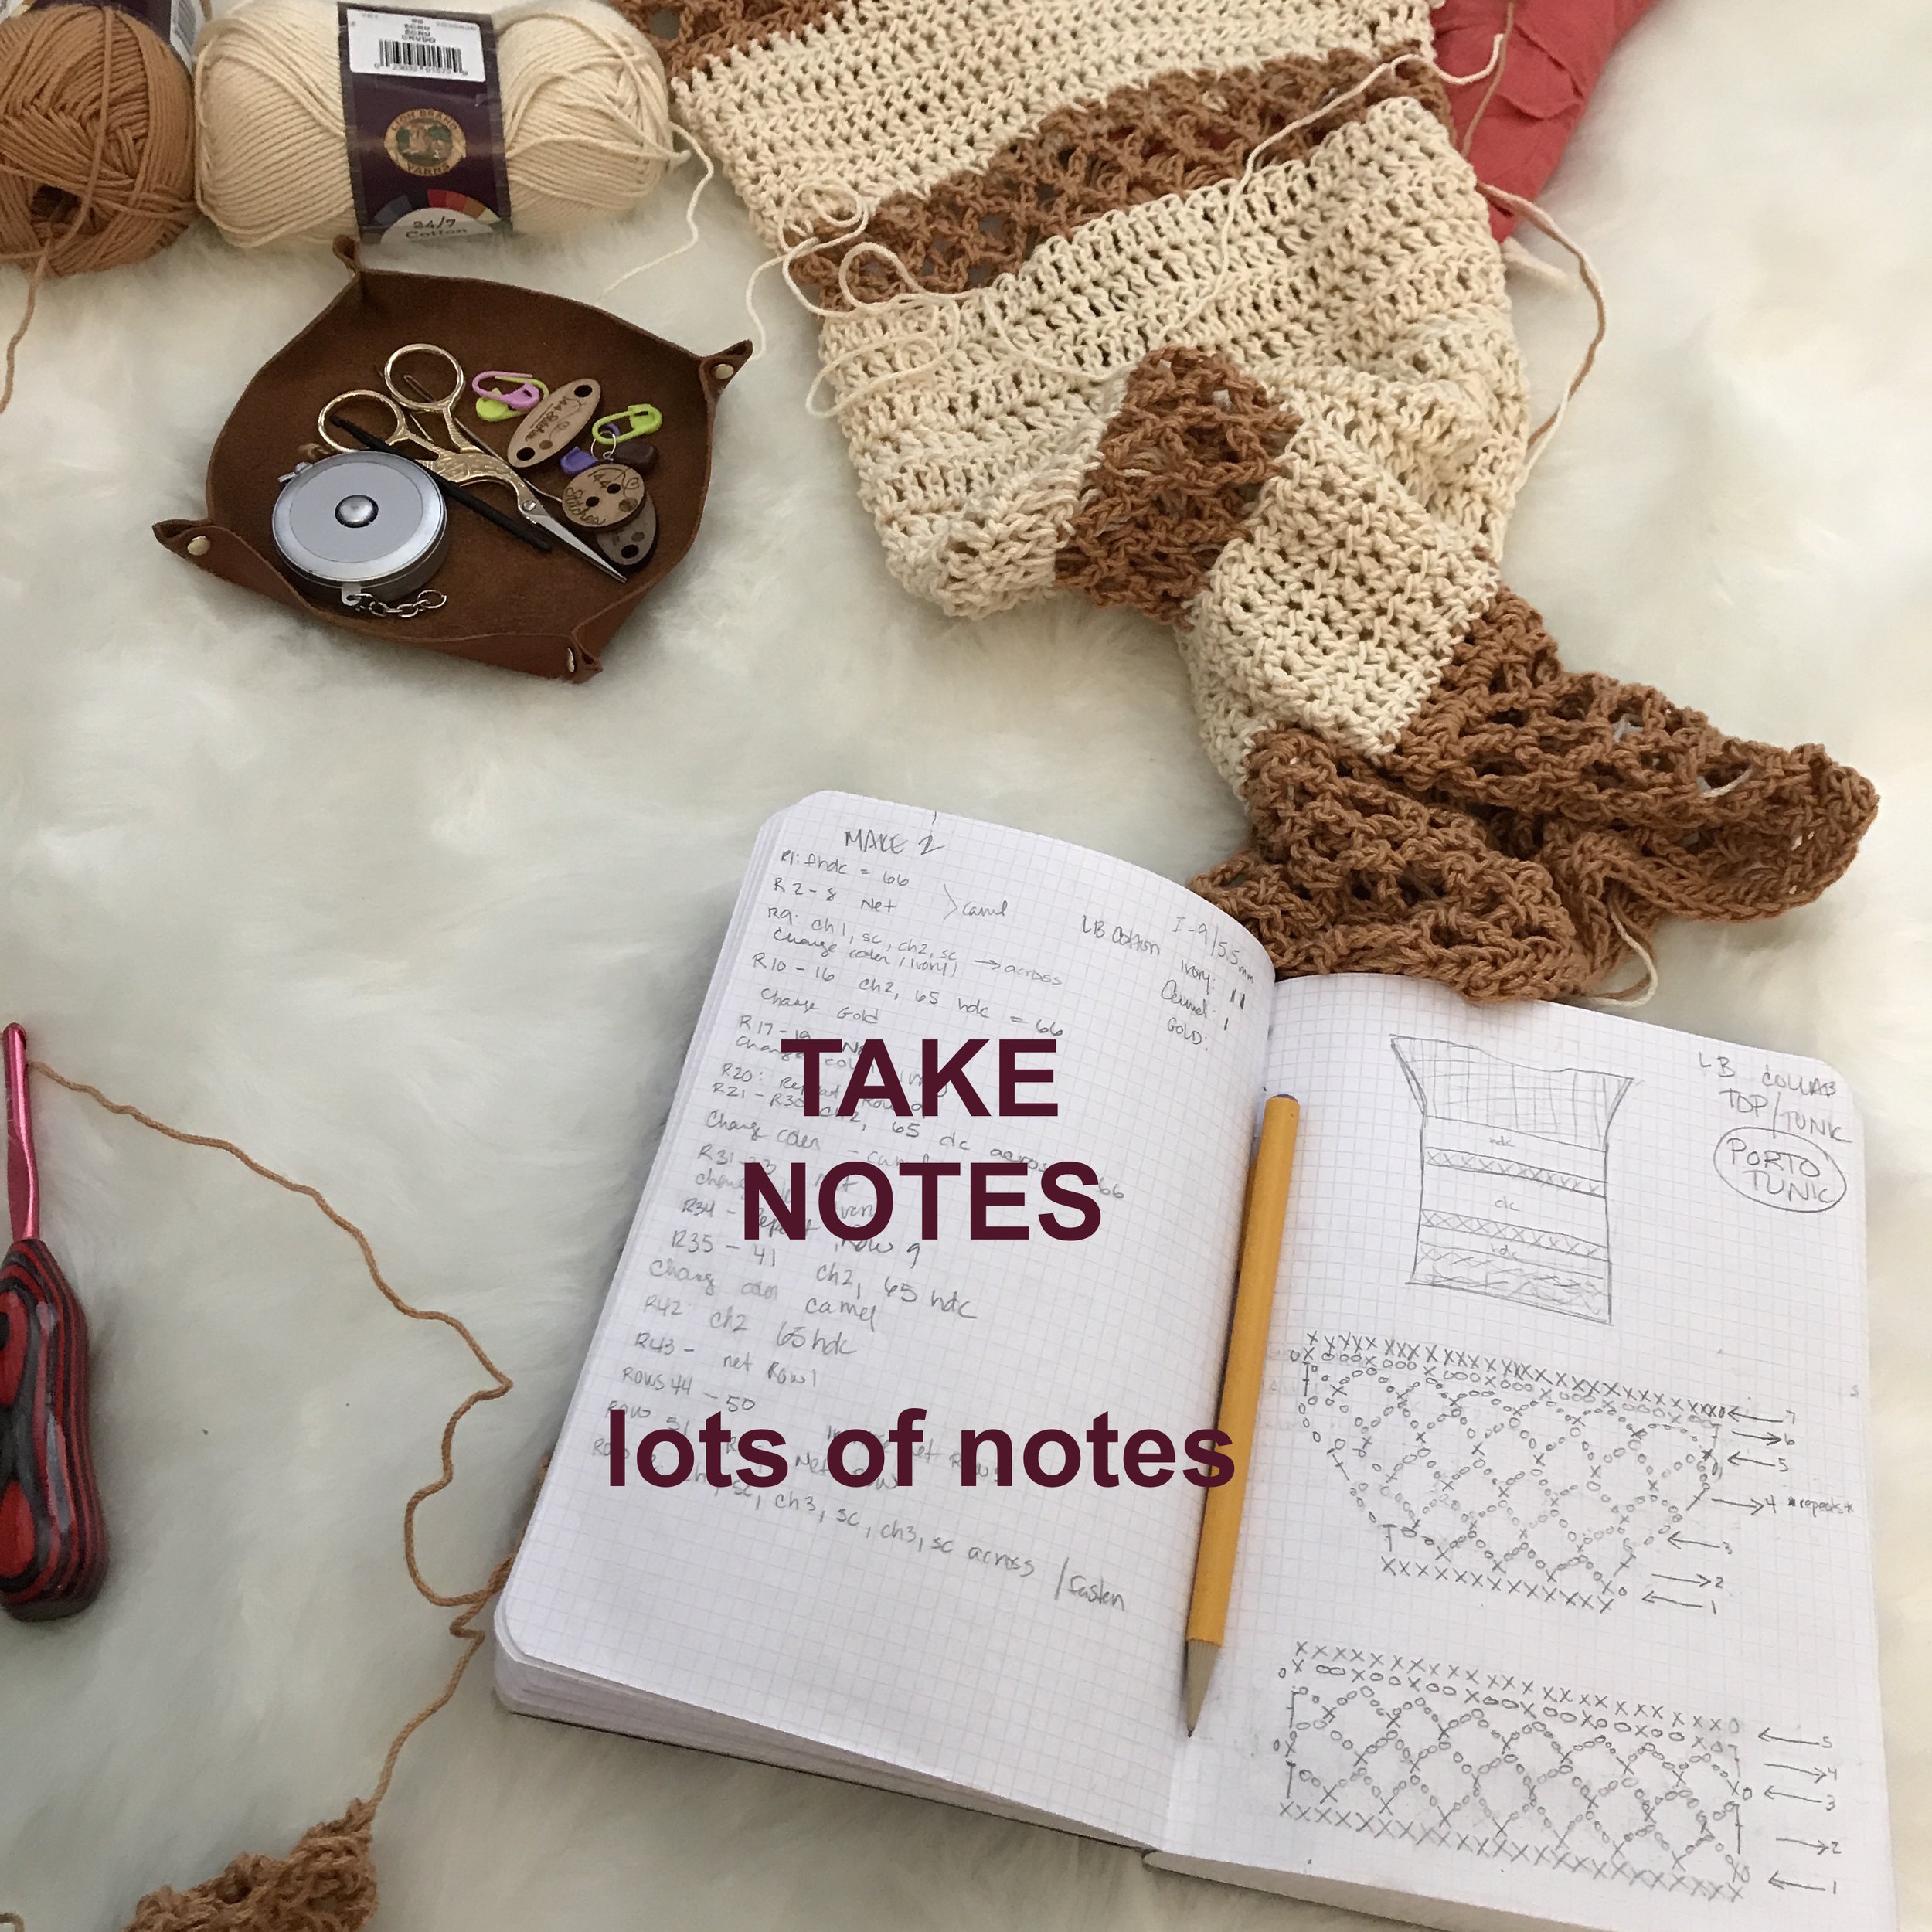
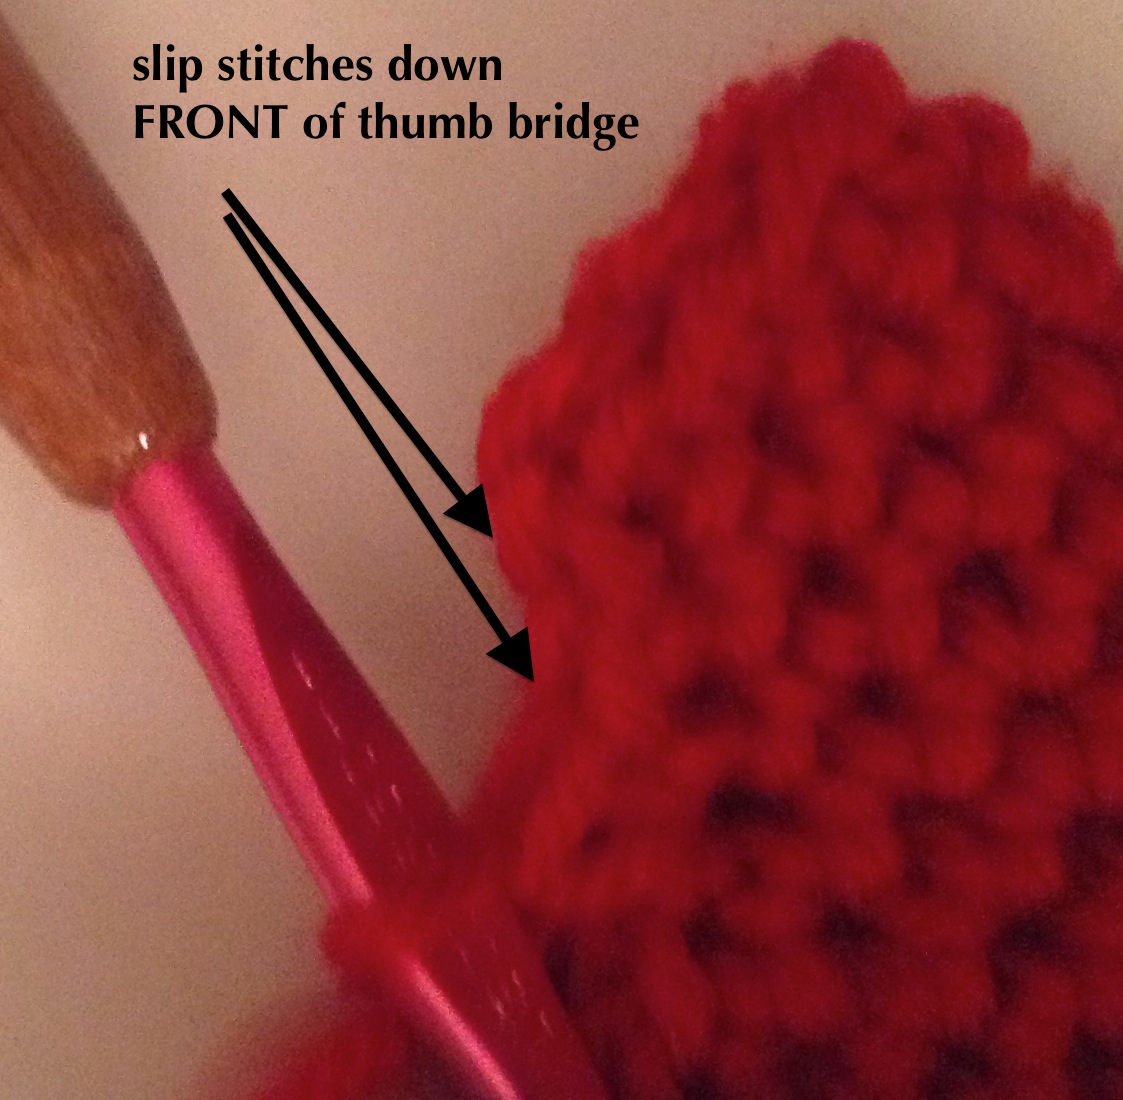
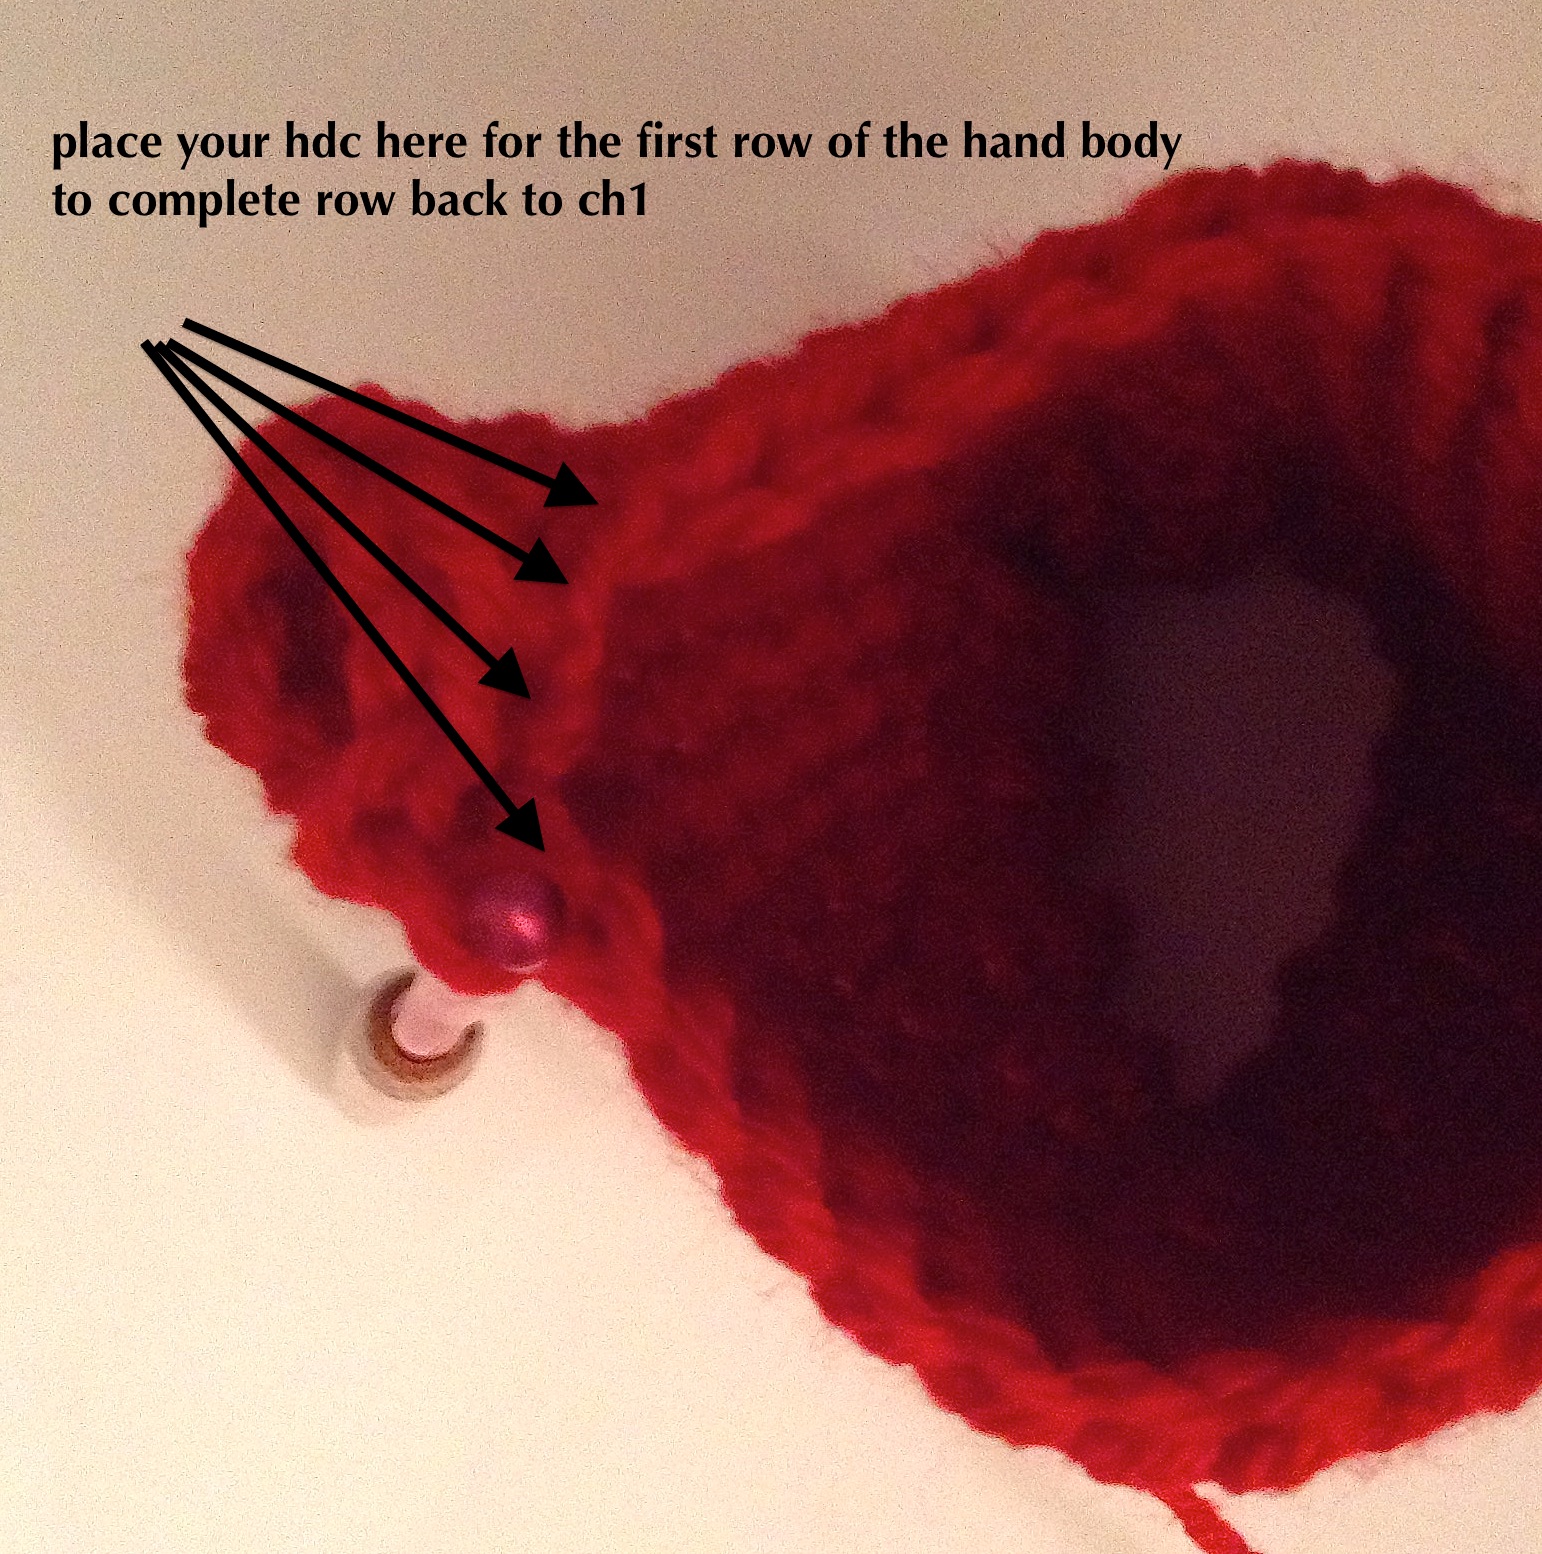
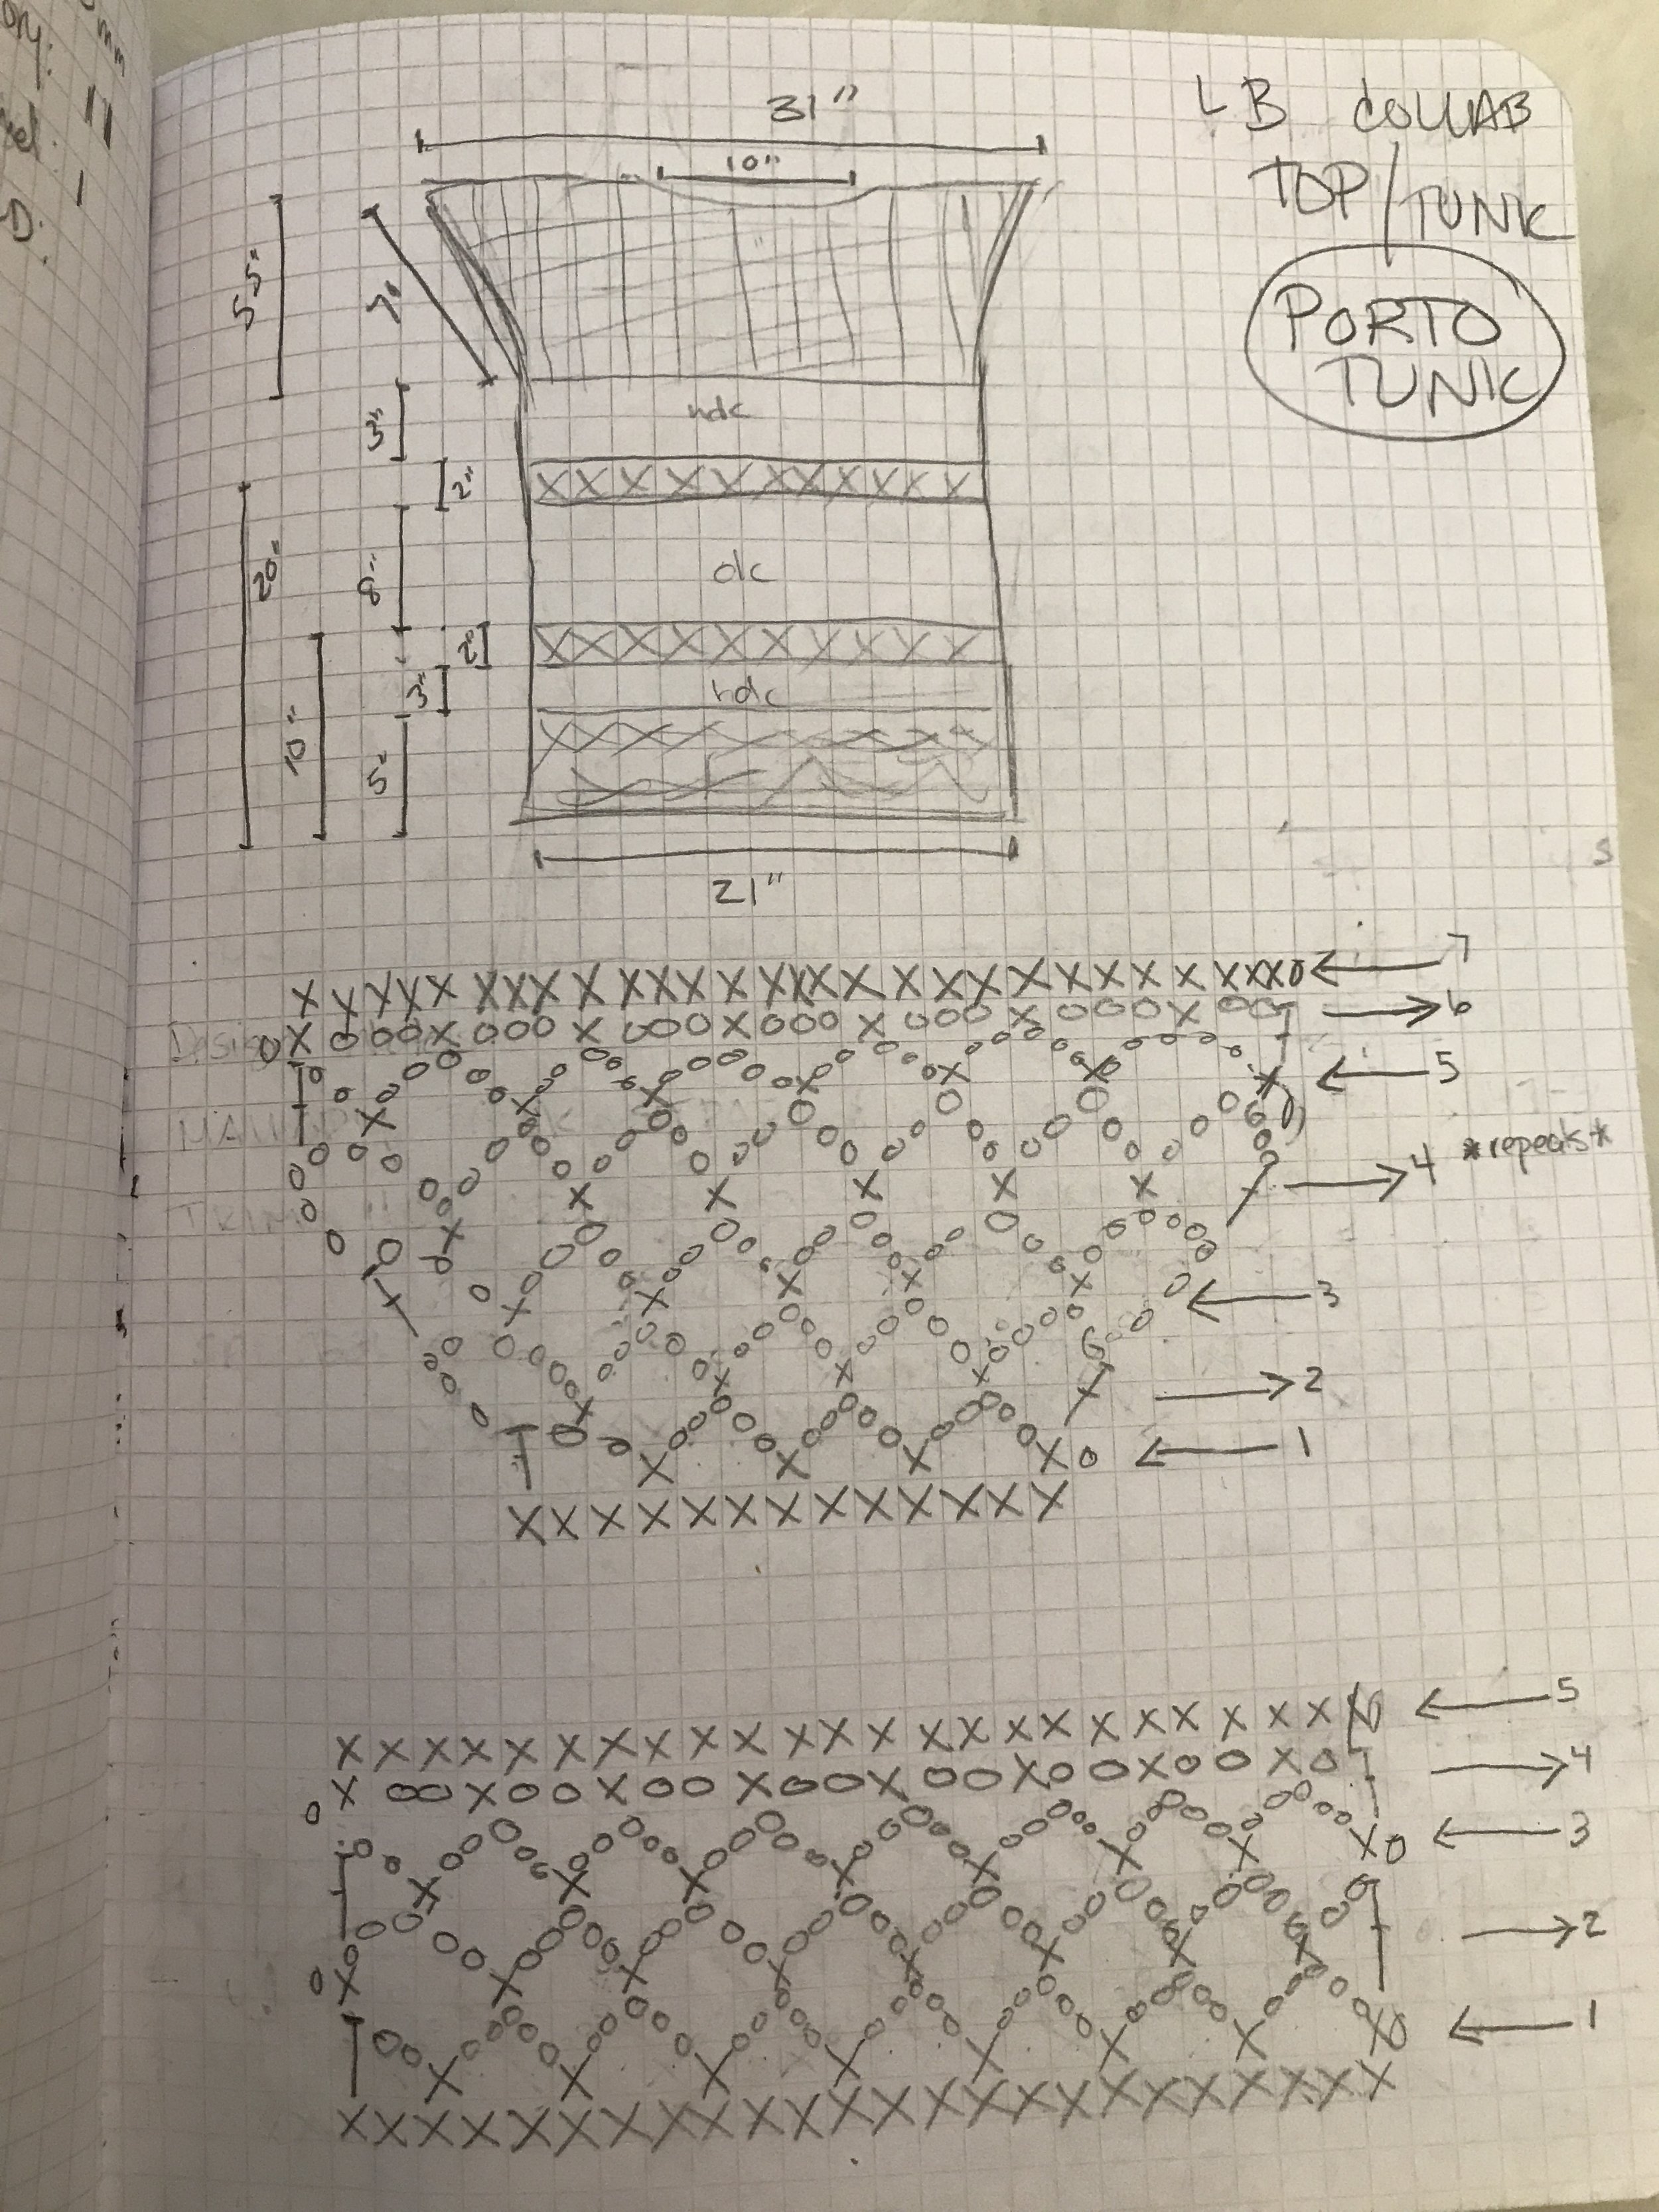
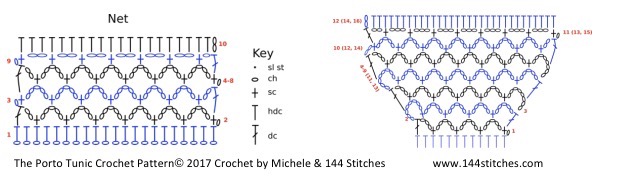
Last But Not Least: Photos & Charts
My patterns are quite detailed and include charts and photos. I take a lot of time (and pride) to include these along with the standard written pattern. Some have more detailed photo illustrations (which ARE covered by copyright by the way) and some have less. It really depends on the design. But the bottom line is consistency. I want my customers to know when they buy my patterns they are getting the full package. The full work went into making them a design and instructions they can follow. Sometimes I do freehand. Sometimes I use illustrator. Sometimes I use Crochet Charts. It all depends on the design. I know that is a bit of a dodgy answer but this question comes over to me a lot and it is really too complex to simply answer. Each design is different.
For real, Last but not least: Pricing & Paid vs. Free
What do you charge? Do you put it up free? Oh this is a tough one. I can only tell you how I decide and you have to make your own choice for what works for you. I put free patterns up on the blog often because why not or maybe as part of collaborations or for examples of my work or if I have something great and easy for a beginner who wants to start or for many other reasons. I like to put up freebies. But it is also how I pay the rent. It is my livelihood. So I don't put them all up free and a lot of work goes into each design.
I base my pricing on the degree of difficulty. Not just in the finished piece but also in the process to create the pattern. I also offer multiple pattern purchase discounts and do a lot of bundles of things that work well together. Pricing is personal. Never let anyone tell you what you "should" charge. But also know your worth. So set a price that YOU feel you are comfortable with, represents the quality of your design and that a customer will pay.
In summary, pattern writing and designing is not easy or fly by night and I do apologize if my first post gave that impression. Like I said - for me it is my passion and comes natural and I do not mind the work because I just love it. Designing is MY JAM! So I want to encourage you but know it takes work. If you have a vision and an idea for a design then YOU SHOULD GO FOR IT! I will tell you that when I do not hear from a customer until the project is complete I am happy. I know I have provided them a clear road map to create something. I know that all that work was worth it and my design is out there living and being created. THAT IS SO COOL.